How To Make And Use GIFs In Your Portrait & Wedding Photography Storytelling
GIFs are super popular in the world of social media and modern communication. Most messenger services let you embed them as a fun way to express yourself in your replies. But have you ever thought about using GIF’s as a way to elevate your client experience as a wedding and/or portrait photographer?
A GIF is like a tiny movie, played on a loop, over and over again. It’s a way to capture a moment or a feeling, and share it with the world. Perfect for adding something special and unique to your storytelling bag of tricks.
It’s like watching a quick scene from a movie but without the sound. Just a series of images, playing in sequence, over and over again. And yet, despite its simplicity, a GIF can convey so much emotion and meaning. In just a few seconds, it can make us laugh or make us go “awwwww!”. It can transport us to another place, or remind us of a special moment in time. A GIF is both eternal and ephemeral, a looping reminder that everything is always changing.
This is a tutorial on how to make GIFs for your wedding and portrait clients in Photoshop. I use Adobe Lightroom to edit my photos, so this tutorial references and uses images of Lightroom, but you can probably get the same results with any photo editing software. One thing you absolutely will need, though, is Adobe Photoshop! I recommend using the most current version available. :)
How I use GIFs
As a wedding and elopement photographer, I love finding new ways to tell my clients’ stories. That’s why I always make sure to include a few GIFs in every deliverable gallery. GIFs are the perfect way to add a little extra intrigue and emotion to your wedding photos. They help to tell the story of your day in a new and unique way, and they’re also a lot of fun to share with friends and family.
You know in the Harry Potter movies, at Hogwarts, how you’ll be walking by a picture on the wall when some slight movement catches your eye and then you realize the picture is alive? MAGIC! That’s how I want my clients to feel when they’re looking through their photo gallery.
How to plan for making GIFs for clients
For a professional photographer, adding GIFs into your photo workflow isn’t that difficult, But if you want great results, you need to do a little planning ahead of time.
First, and most important, it’s all about mindset. Before you even get to the place where you’ll be photographing, think about what kind of GIFs you want to make. You can even come up with a “shot list” that has a handful of ideas you want to try to create. If you arrive and start photographing with your plan for GIFs already in your mind, you’ll find shooting for them much easier.
Second, know that you’ll need a series of images to create the GIF. I’ll talk more about the specifics of how to do this in a bit, but for now, just know you’ll need to set your camera so that it takes a burst of shots all at once. Here’s a web article on setting up burst mode. If you have a choice, choose the fastest frames-per-second (high-speed).
How to shoot a GIF
The biggest thing to remember (and possibly the hardest) is that for a GIF to look the best, you want to shoot your sequence of images without having the camera move at all. This way the GIF runs smoothly and doesn’t “jump around”.
Should you use a tripod? While a tripod is probably the best way to prevent your camera from moving, it just isn’t doable when you’re in the middle of a moment during a wedding or portrait session. So the best advice I can give you is to slow down for a second, be intentional about creating your GIF, be as still as possible while you shoot it, and brace your elbows against your torso to create a “human tripod“.
Manual mode
Another thing to remember is to have your camera on manual mode so that the exposures for each shot in the sequence match. This will save you so much work and result in a much better GIF!
How many frames?
Take a series of frames that will loop well. Most of the GIFs I make are around 7-10 frames, but sometimes I shoot a lot more than that to get a better variety of sequences. It just depends on what I’m shooting.
For GIFs with people moving, think about what would loop well. For example, someone walking across a field in front of you from the left to right, isn’t going to loop well because when it loops, they’ll jump from the right side of the GIF to the left and start it over again.
Think like a loop
The best way to think about this is kind of like a looping, circular motion. So that when the GIF ends, the frame it ends on is similar to the frame where it starts. That way the GIF can loop over and over and look natural.
Subtle motion
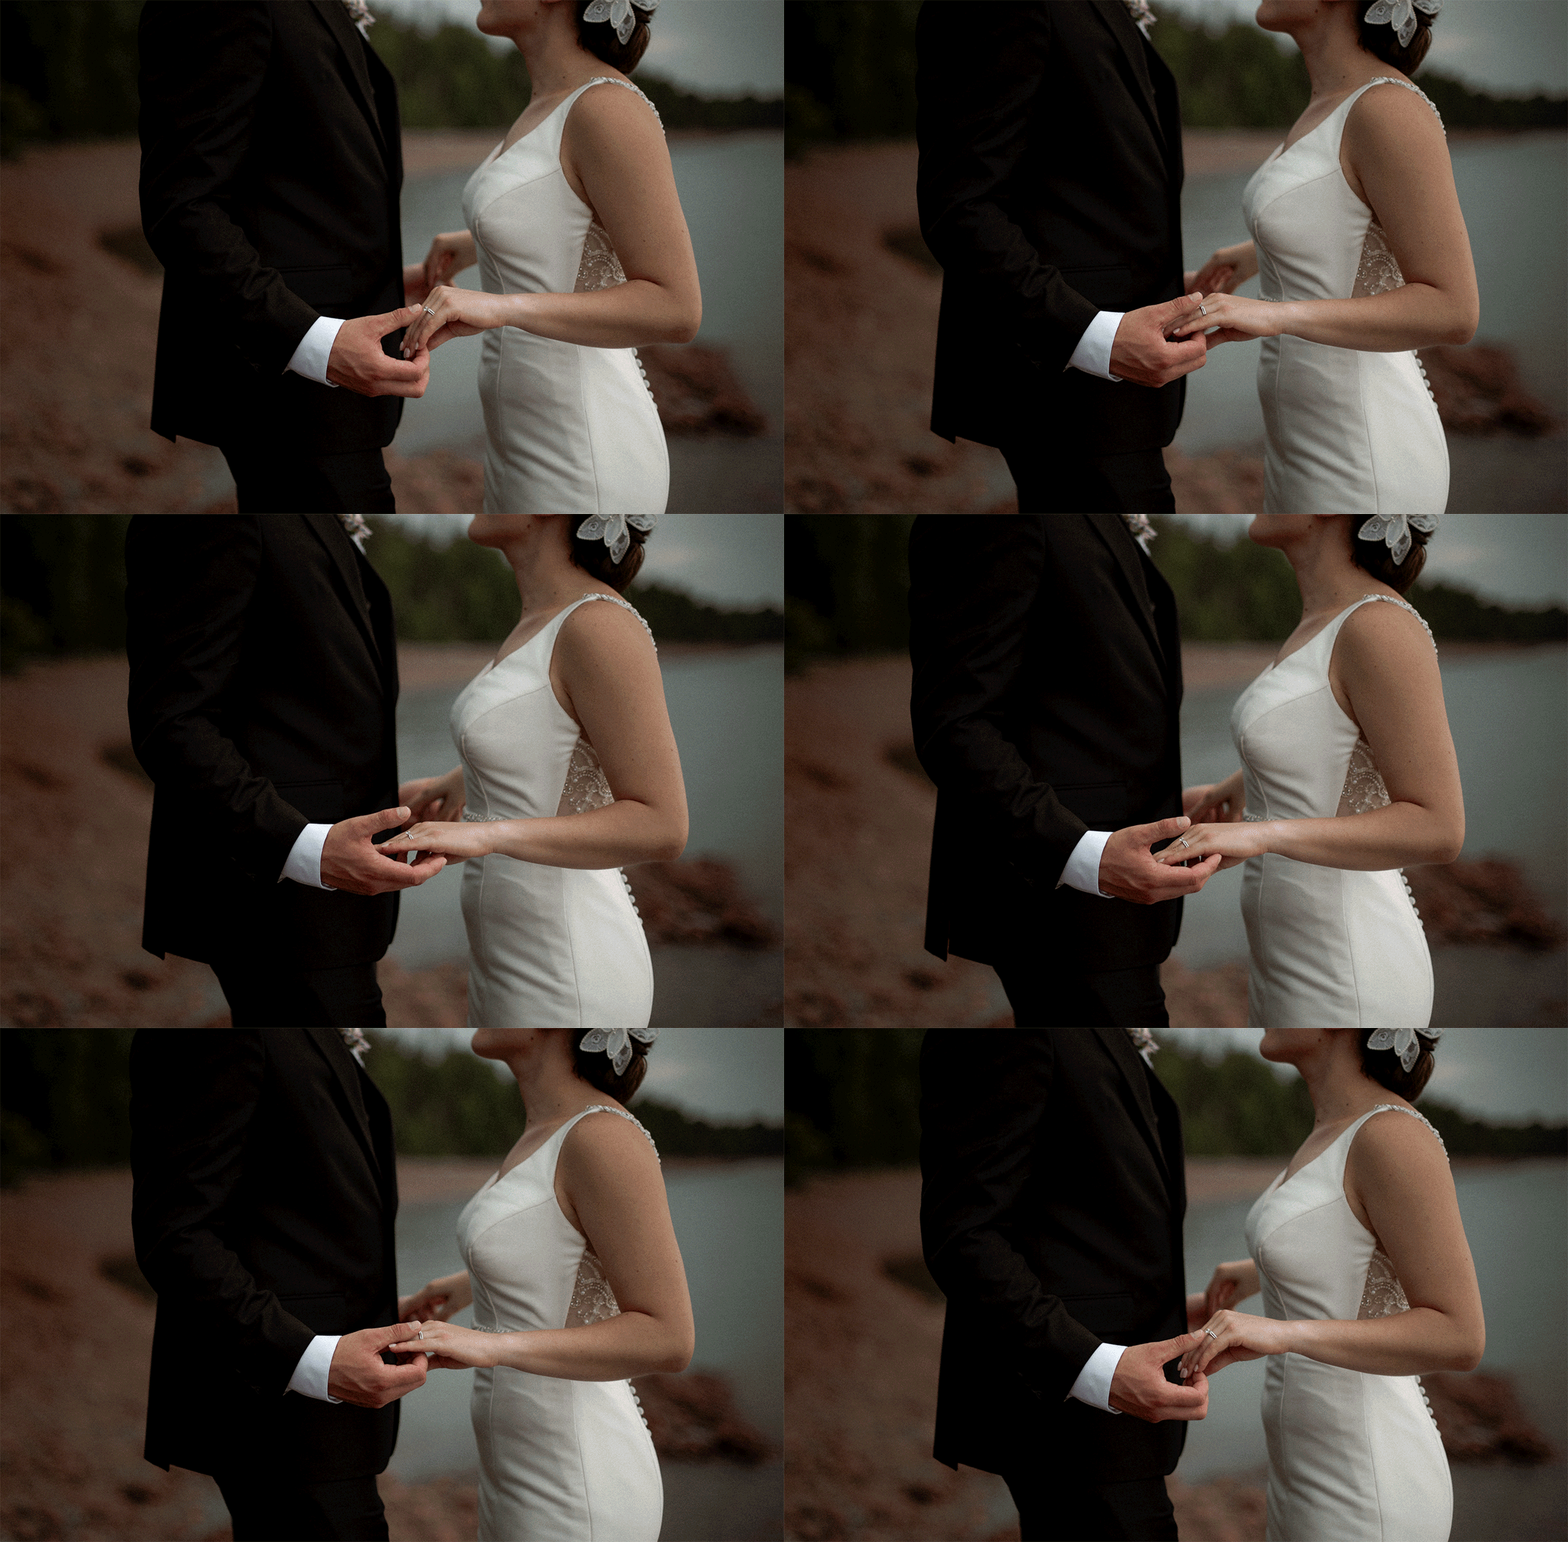
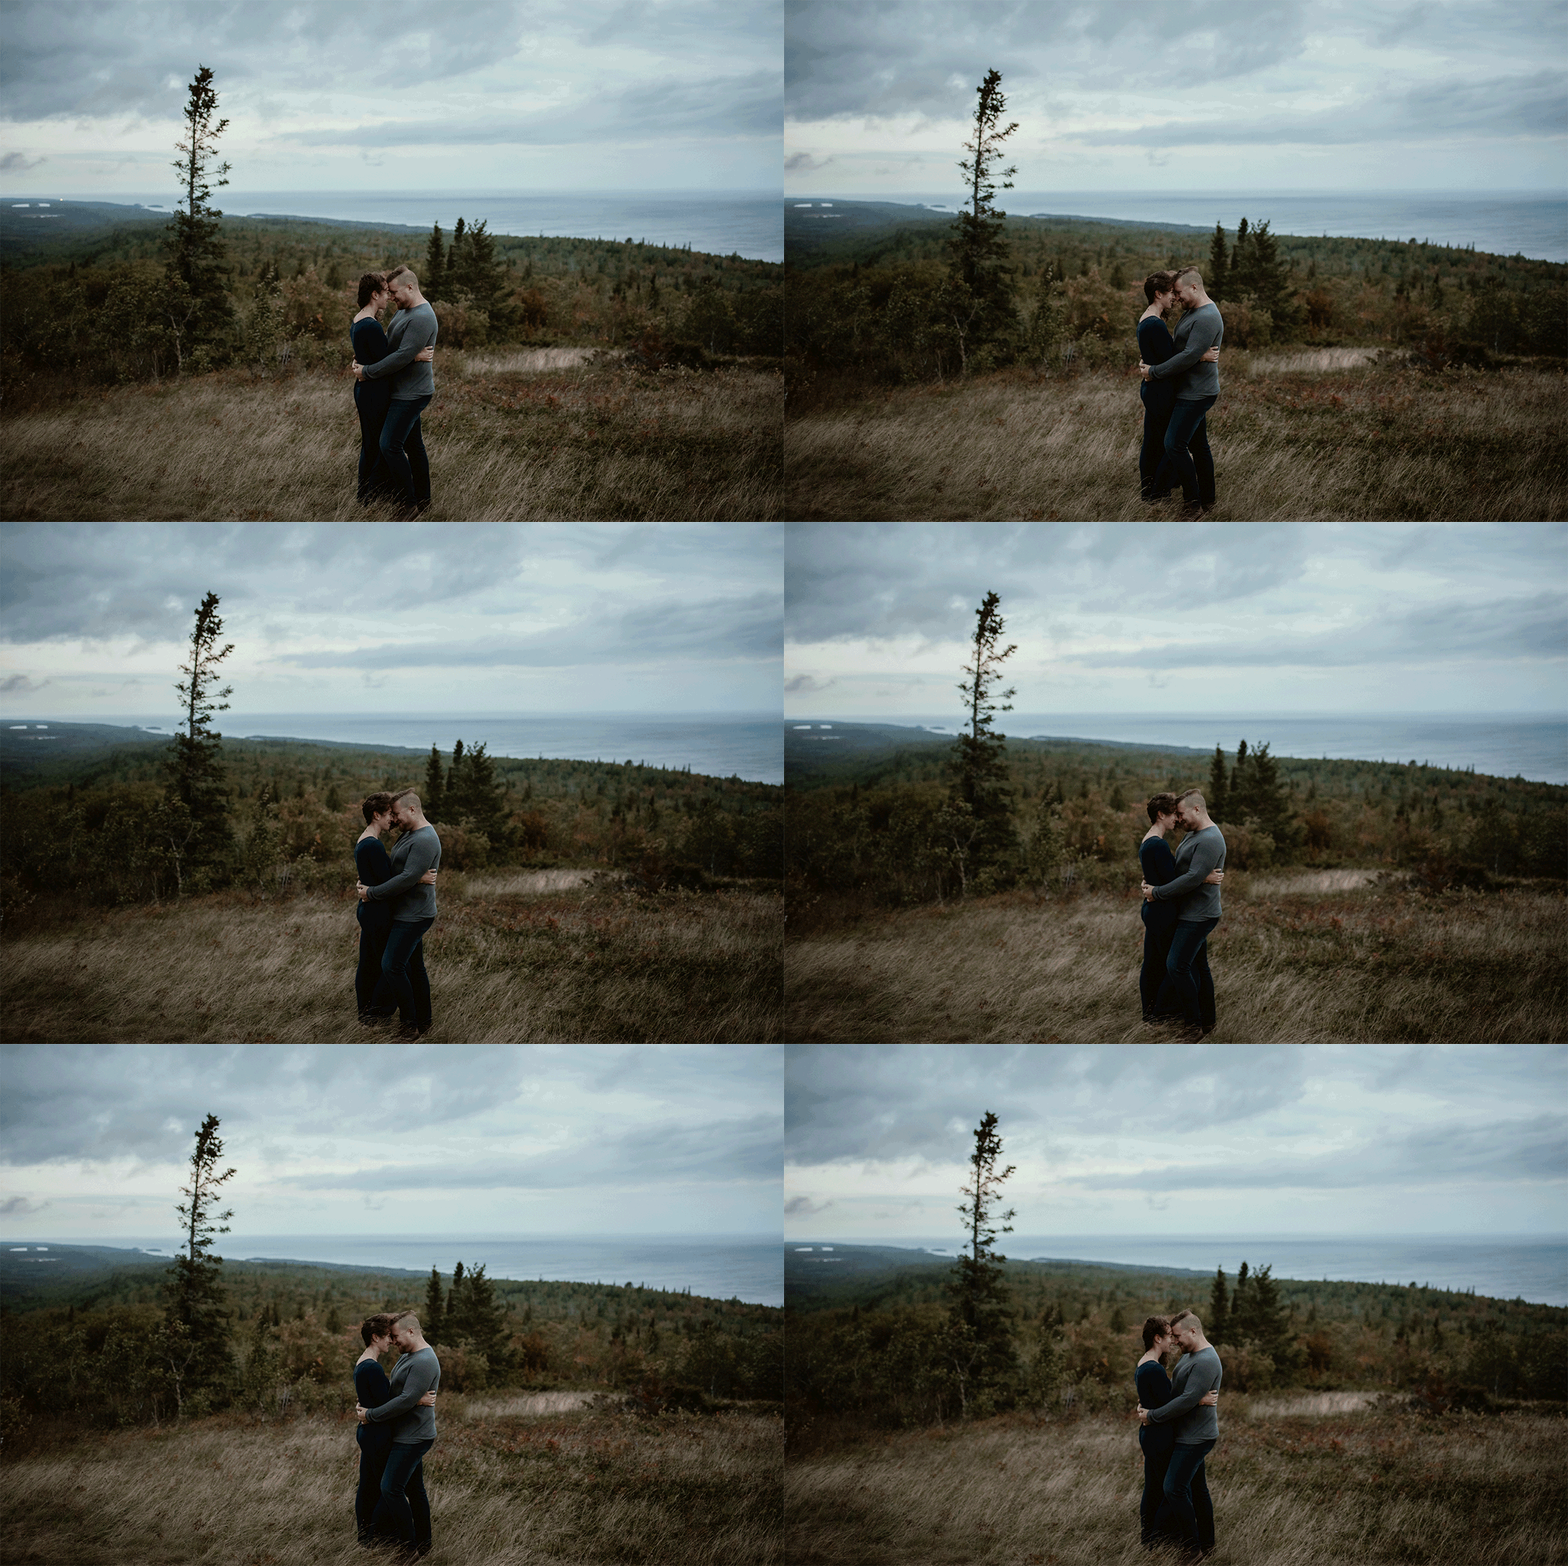
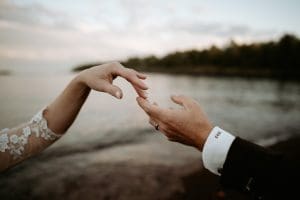
I love making GIFs that have subtle, smooth motion. Like the Hogwarts paintings, I want my GIFs to be subtle. Challenge yourself to capture movement that’s very slight, instead of big motion. Like the wind blowing hair or leaves rustling, or a couple’s hands as they hold each other.
Leave room
When you compose your GIF images, try to leave lots of space around the edges of the frames to allow for cropping later on. You’ll thank me for this later!
GIF ideas
Here are some ideas for GIFs that would be great for adding to a wedding or portrait story:
Environmental GIFs
- Rain or snow falling on the ground
- Leaves rustling
- Birds flying
- Clouds moving
Details GIFs
- Wedding bouquet being held by the bride and slowly spinning
- The wedding dress train moving across the floor
- Hair blowing in the wind
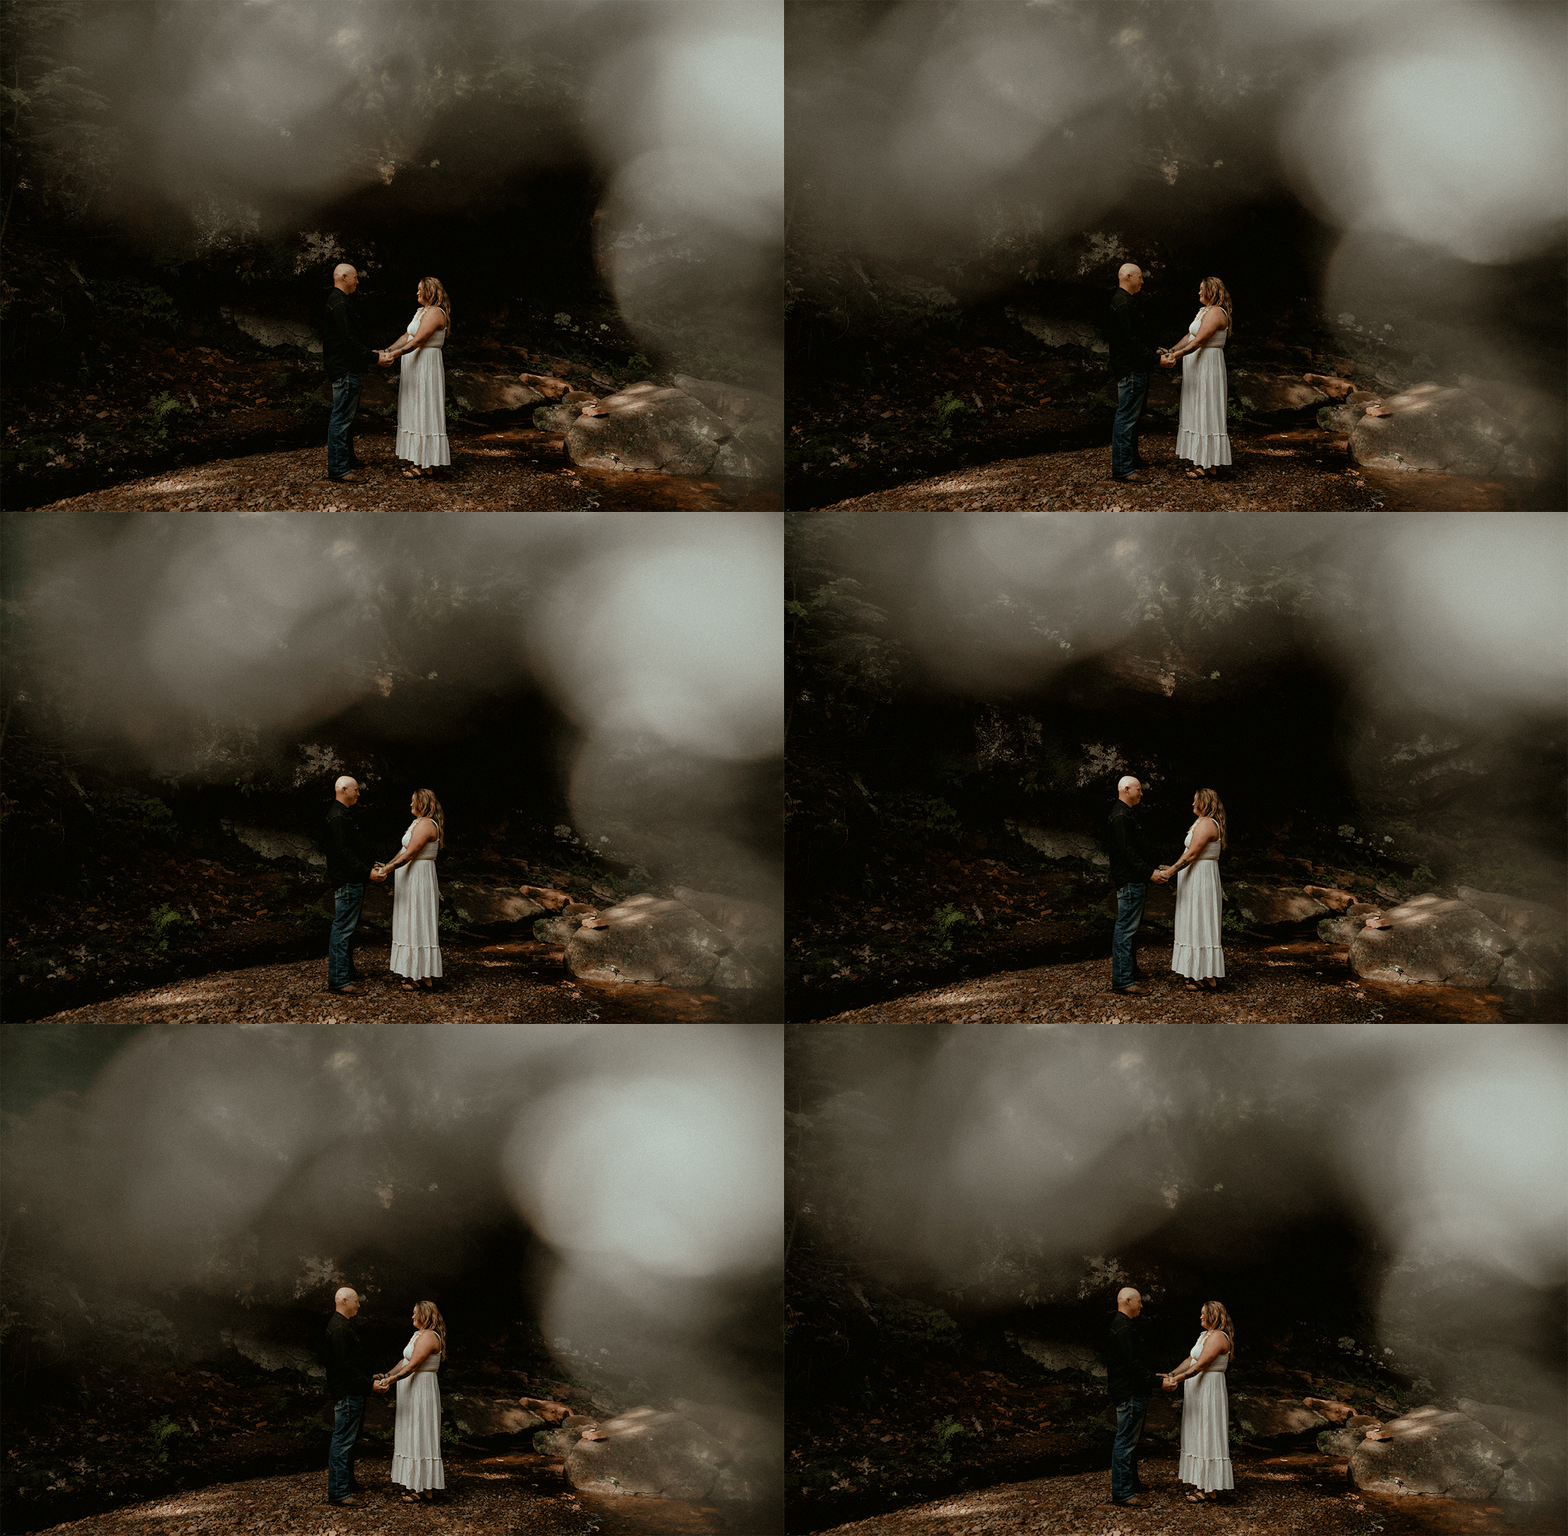
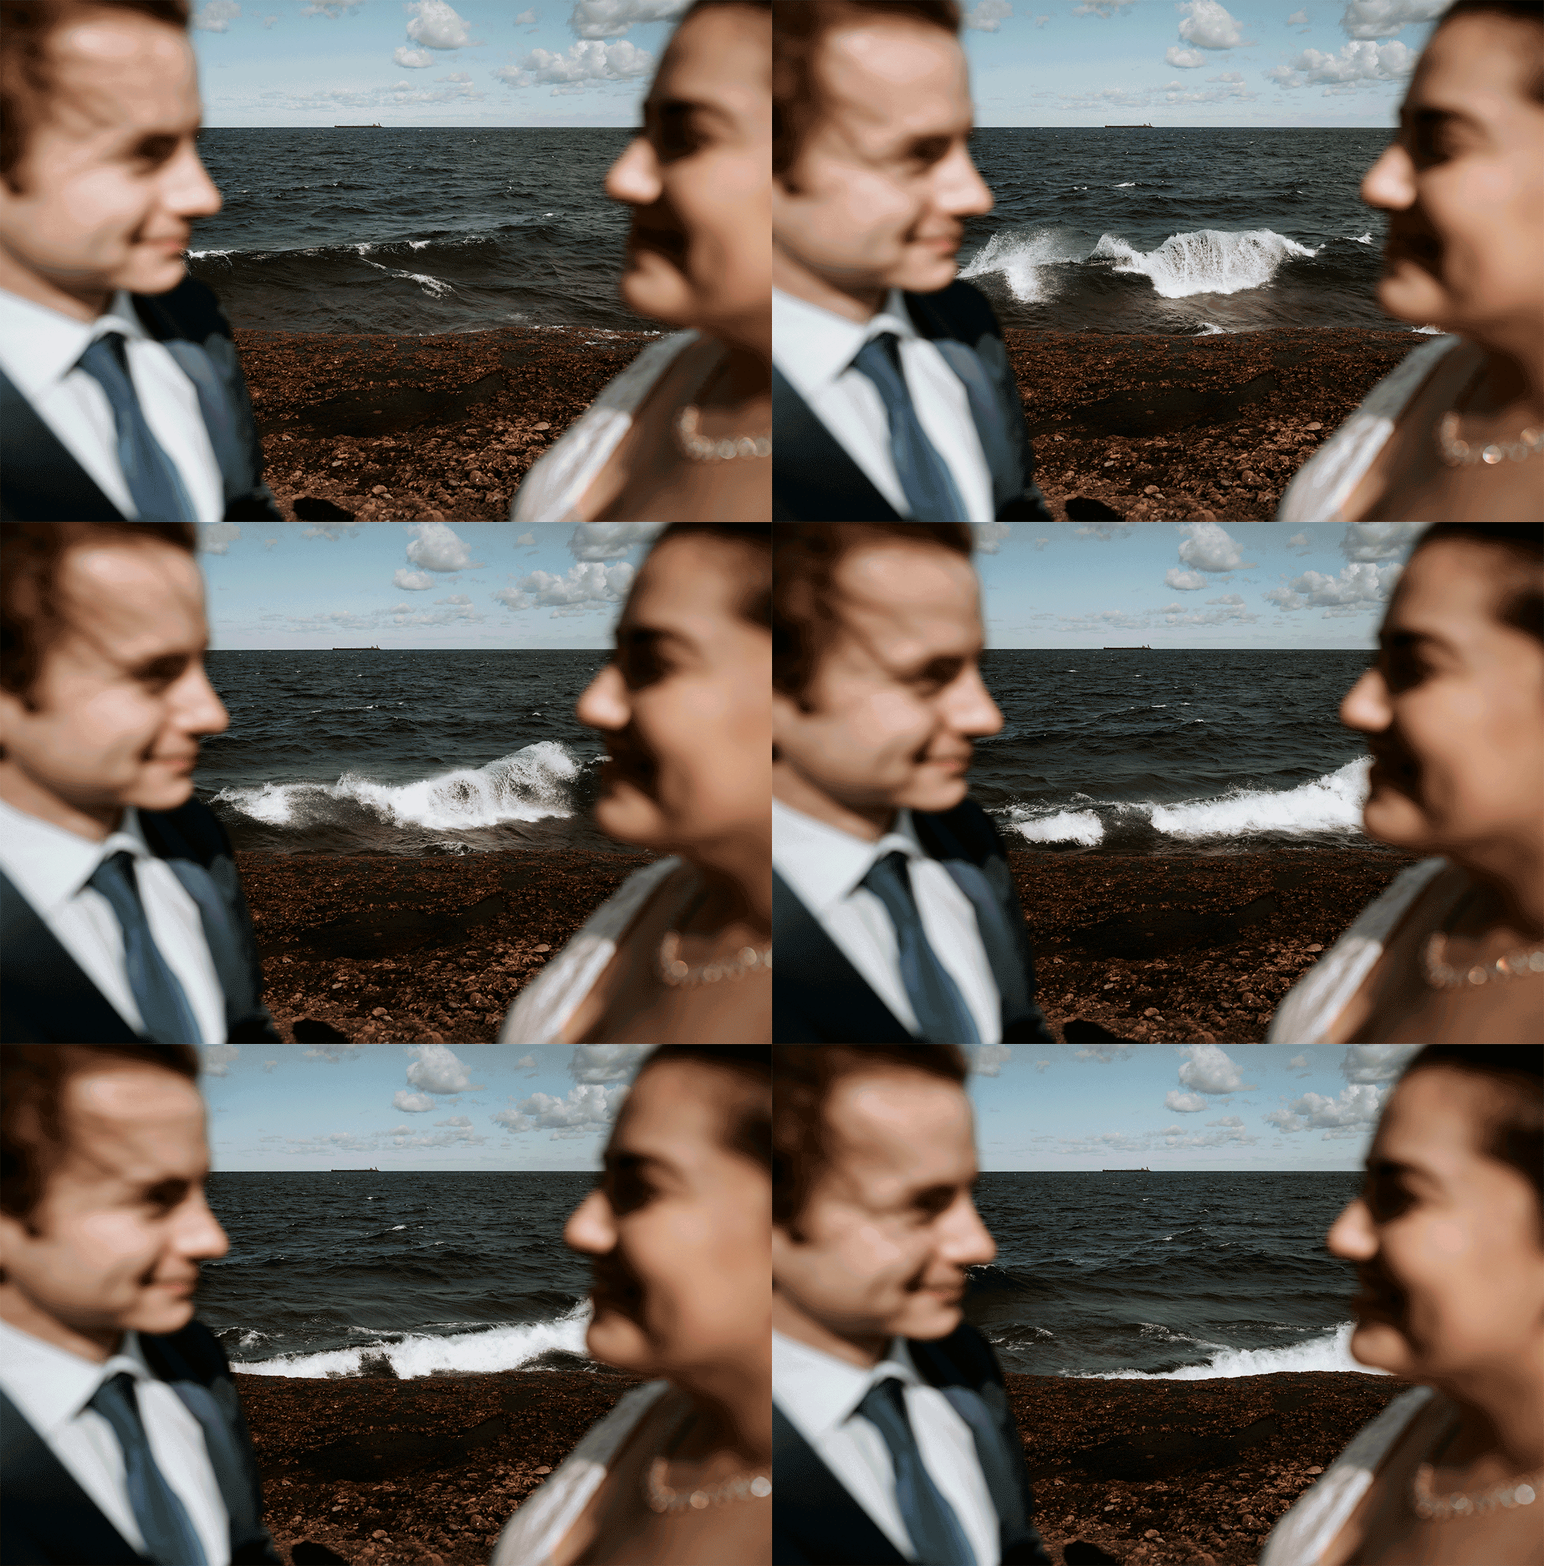
- Image that goes from out of focus to in-focus and back
Couples GIFs
- Grasping hands
- Squeezing each other in
- Slow dance
- Close up of hands, caressing
Single person GIFs
- Twirling in a circle
- Looking down, then slowly looking up
- Standing in one spot but slightly swaying
- Running fingers through hair
Group of people GIFs
- All jump for joy at the same time
- Hold hands in a circle and slowly spin
- (In the fall) grab a bunch of leaves and throw them in the air
- Hold hands and sway back and forth together
Editing GIFs
I use Lightroom to edit my photos, but if you use something else the concepts here should still apply.
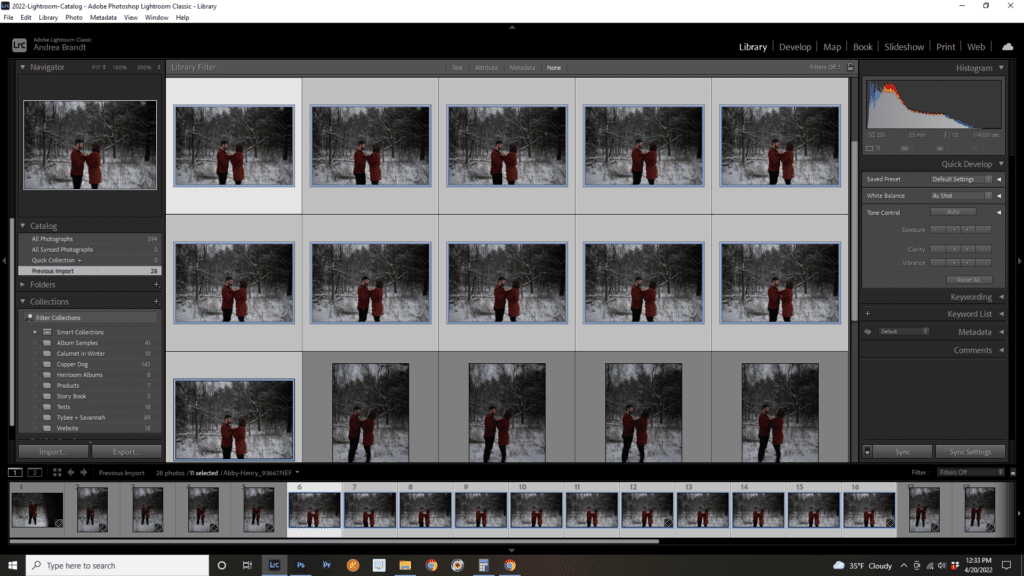
In Lightroom or whatever you use to edit your photos, bring up your series of images for your GIF. You can use your right & left arrow keys to quickly scroll through and “preview” what the GIF will look like. You can then pick the exact frames you’ll use in your GIF. I like to flag my GIF picks blue in Lightroom, to keep everything organized.
Edit the photos to match
Once you have your GIF photos selected, go ahead and edit them so they match. Make sure the exposure, white balance, and cropping all match. You don’t have to worry about the crop at this point, so I always just leave it at the original crop even if it’s crooked or whatever.
I find that for GIFs it’s best to have your exposure end up in the middle- not too bright and not too dark. I use the histogram in Lightroom to check this. Here’s a good article on using the histogram to check your exposure.
Here’s a little trick I use sometimes. If the exposures don’t match in your images for whatever reason- you forgot to shoot in manual, the lighting changed, etc. – try this hack. Edit the exposure on the first image in the sequence. Hold down Shift, click on the first image, then the last image in the sequence to select them all, then in the top Lightroom Menu go to Settings > Match Total Exposures. This can sometimes save a lot of time and work, or save a GIF altogether!
I would avoid using any vignette effects because it could “move around” after the final crop. I’d also recommend not doing any local adjustments like spot healing because you’ll be able to see the spots “move” in the GIF.
Bring your images into Photoshop
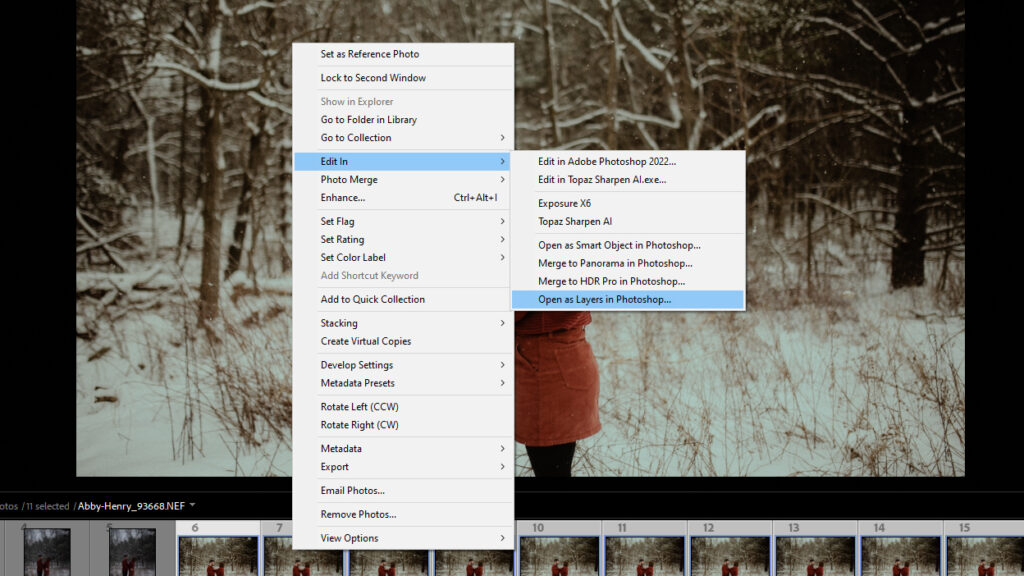
Once you have your series of images that match as closely as possible it’s time to bring them into Photoshop. From Lightroom, I select the series of images and right-click on them in the preview bar at the bottom. I then select “Edit in…” and then “Open as Layers in Photoshop”.
Make sure you choose to open as layers and not “Edit in Photoshop” so that the images are stacked correctly. Be sure to open your images in Photoshop with the Lightroom adjustments included.
This will pull the images from Lightroom into Photoshop and when you’re done editing them and save your GIF, you can go right back to Lightroom.
Make your GIF
In Photoshop, you’ll see your images open in the Layers Panel in the bottom right. Once they’re all there, move your mouse over the top image in the Layers Panel, hold your shift key, and then click on the bottom image. This will select them all (they’ll turn a darker gray to indicate that they’re selected).
The correct sequence
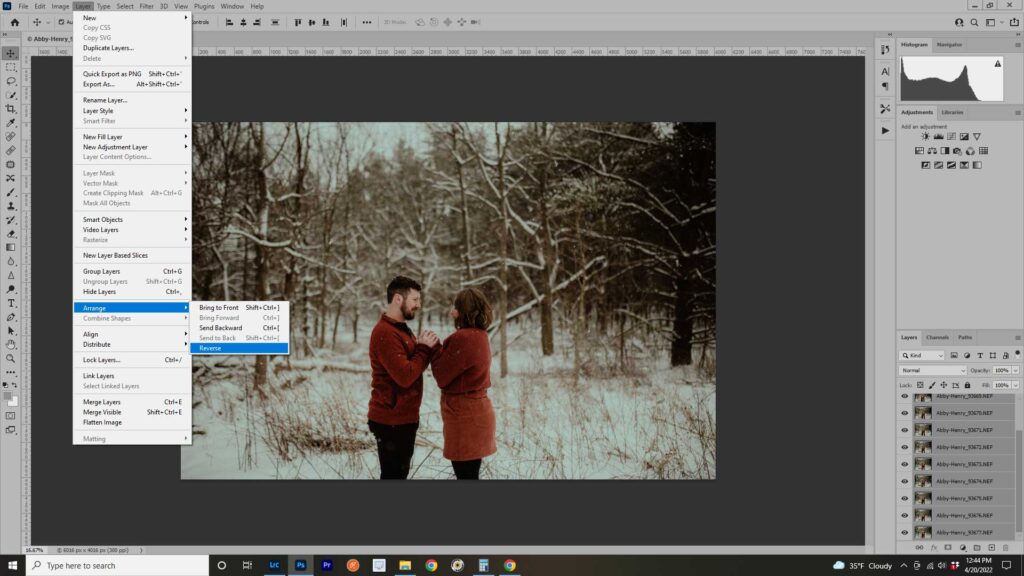
Go to the Photoshop top menu, click on Layer > Arrange > Reverse. This will reverse the order of the images in the sequence so your GIF plays forward not backward. :)
Open the Timeline Window
Next, open the Timeline Panel by going to Window in the top menu and clicking on Timeline. The Timeline window will open up across the bottom of your workspace. In the center of it will be a drop-down menu button. Make sure it says “Create Frame Animation”.

Make sure all of the images in your Layers panel are still selected, then click on the “Create Frame Animation” button in the Timeline panel. You’ll see the first of your images pop up in the Timeline Panel sequence.
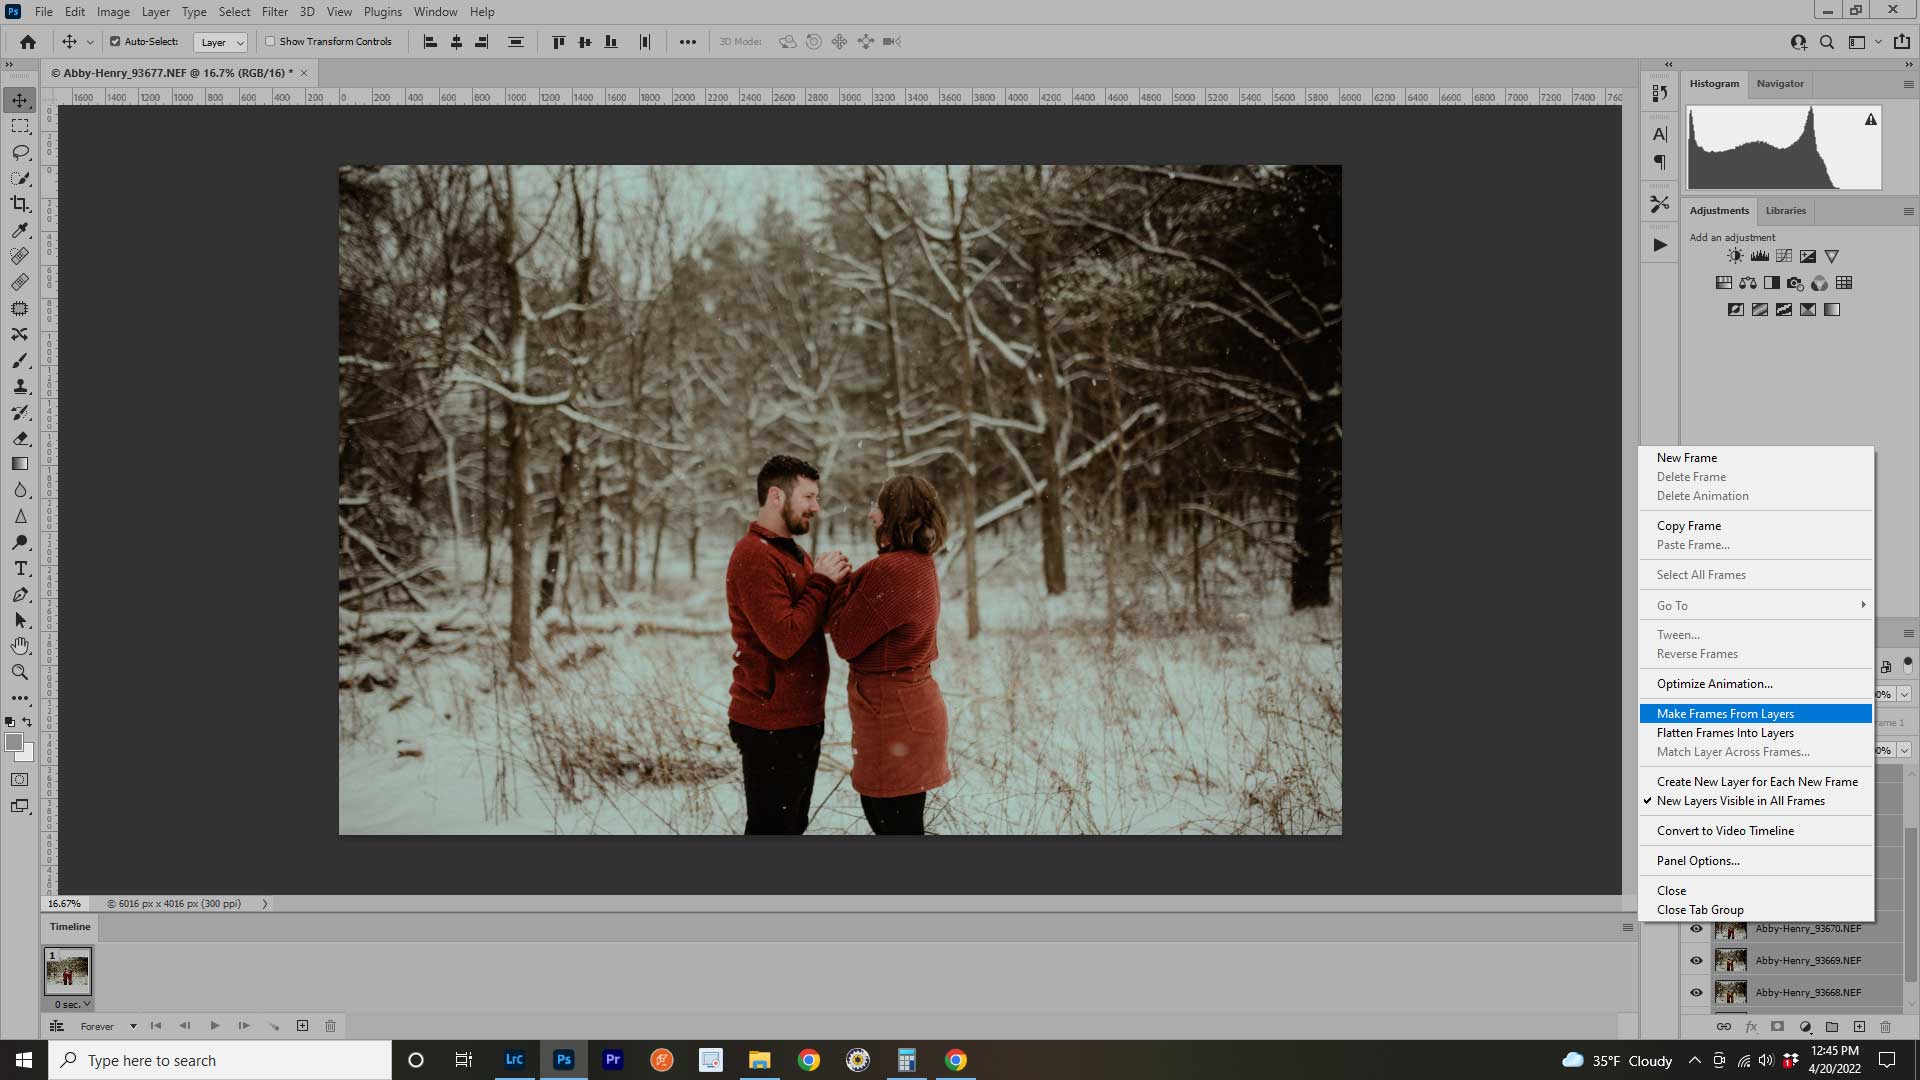
Then, click on the little “hamburger menu” at the top right of the Timeline Panel and then click “Make Frames From Layers”. You’ll see all of the images pop up in the Timeline panel, in sequence.
*Just a note- if you forgot to reverse the frames in the Layer Panel, you can select the frames you want to reverse in the Timeline Panel and then click on the hamburger menu and select “Reverse Frames”.
Set the frame rate
Now you have your GIF image sequence ready. You need to set the frame rate. The frame rate determines how long each image will be displayed before the next image appears. The default is 0 seconds, which means each frame will play for 0 seconds – that’s EXTREMELY FAST! The speed you choose will depend on how fast your burst mode captured each frame, and also what the GIF contents are.
To change the frame rate for all of the images in the sequence, select them all in the Timeline Panel (again, you can hover over the first selected image, hold Shift, and then click on the last image in the sequence to select them all. Now if you change the frame rate for one image, it will change them all to match.
Use the little dropdown arrow below one of the images to change the frame rate. You can select from one of the options, or click “other” and type in your own number. I find that I usually click on 0.2 seconds just to preview the GIF and then adjust from there. For my Nikon D750’s, set on Continuous High burst mode, the correct frame rate usually is 0.15 seconds for natural, realistic movement.

Make sure the looping option (bottom left of Timeline Panel) is set to “Forever”. You can then preview your GIF by clicking on the play button icon in the Timeline panel.
Make a loop manually (optional)
If your image sequence doesn’t loop there’s an option that might work to make it loop. You can select all of the images in the Timeline sequence, then click on the tiny box with a + in it, at the bottom of the Timeline Window. This will duplicate the images in the Timeline and add them to the sequence.
Next, go to the hamburger menu and click on “Reverse Frames” (make sure that just the duplicate images are selected in the Timeline).
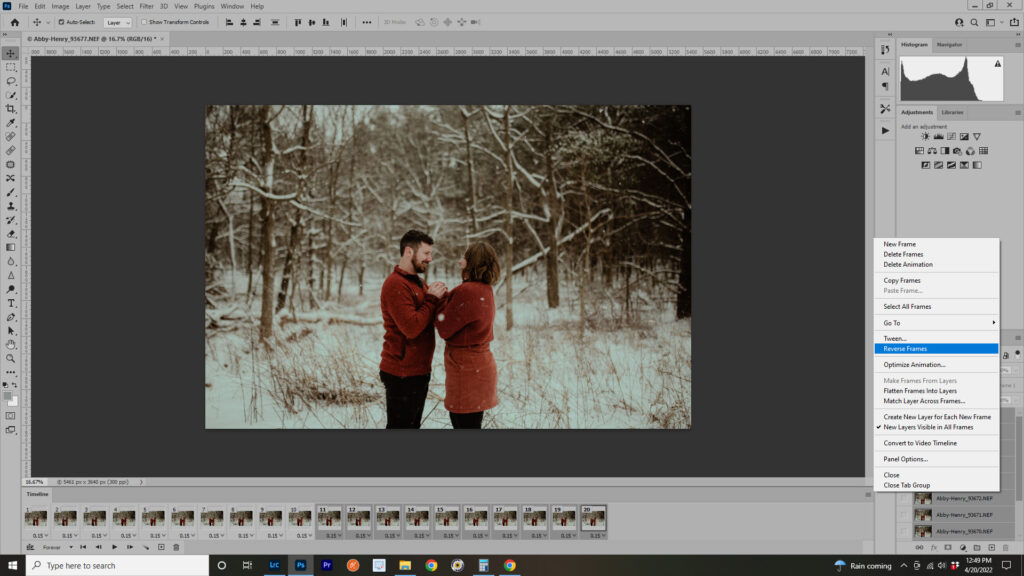
Now go to the first and last image in that duplicate sequence and delete them. (Hold the ctrl or cmd key when you click to select and you can select more than one image at a time.) If you don’t, you’ll have two frames at the beginning and end of your sequence that are exactly the same, so when the GIF plays the first and last images will play twice as long as the rest. To delete them, just click, drag and drop them over the little trash can icon.

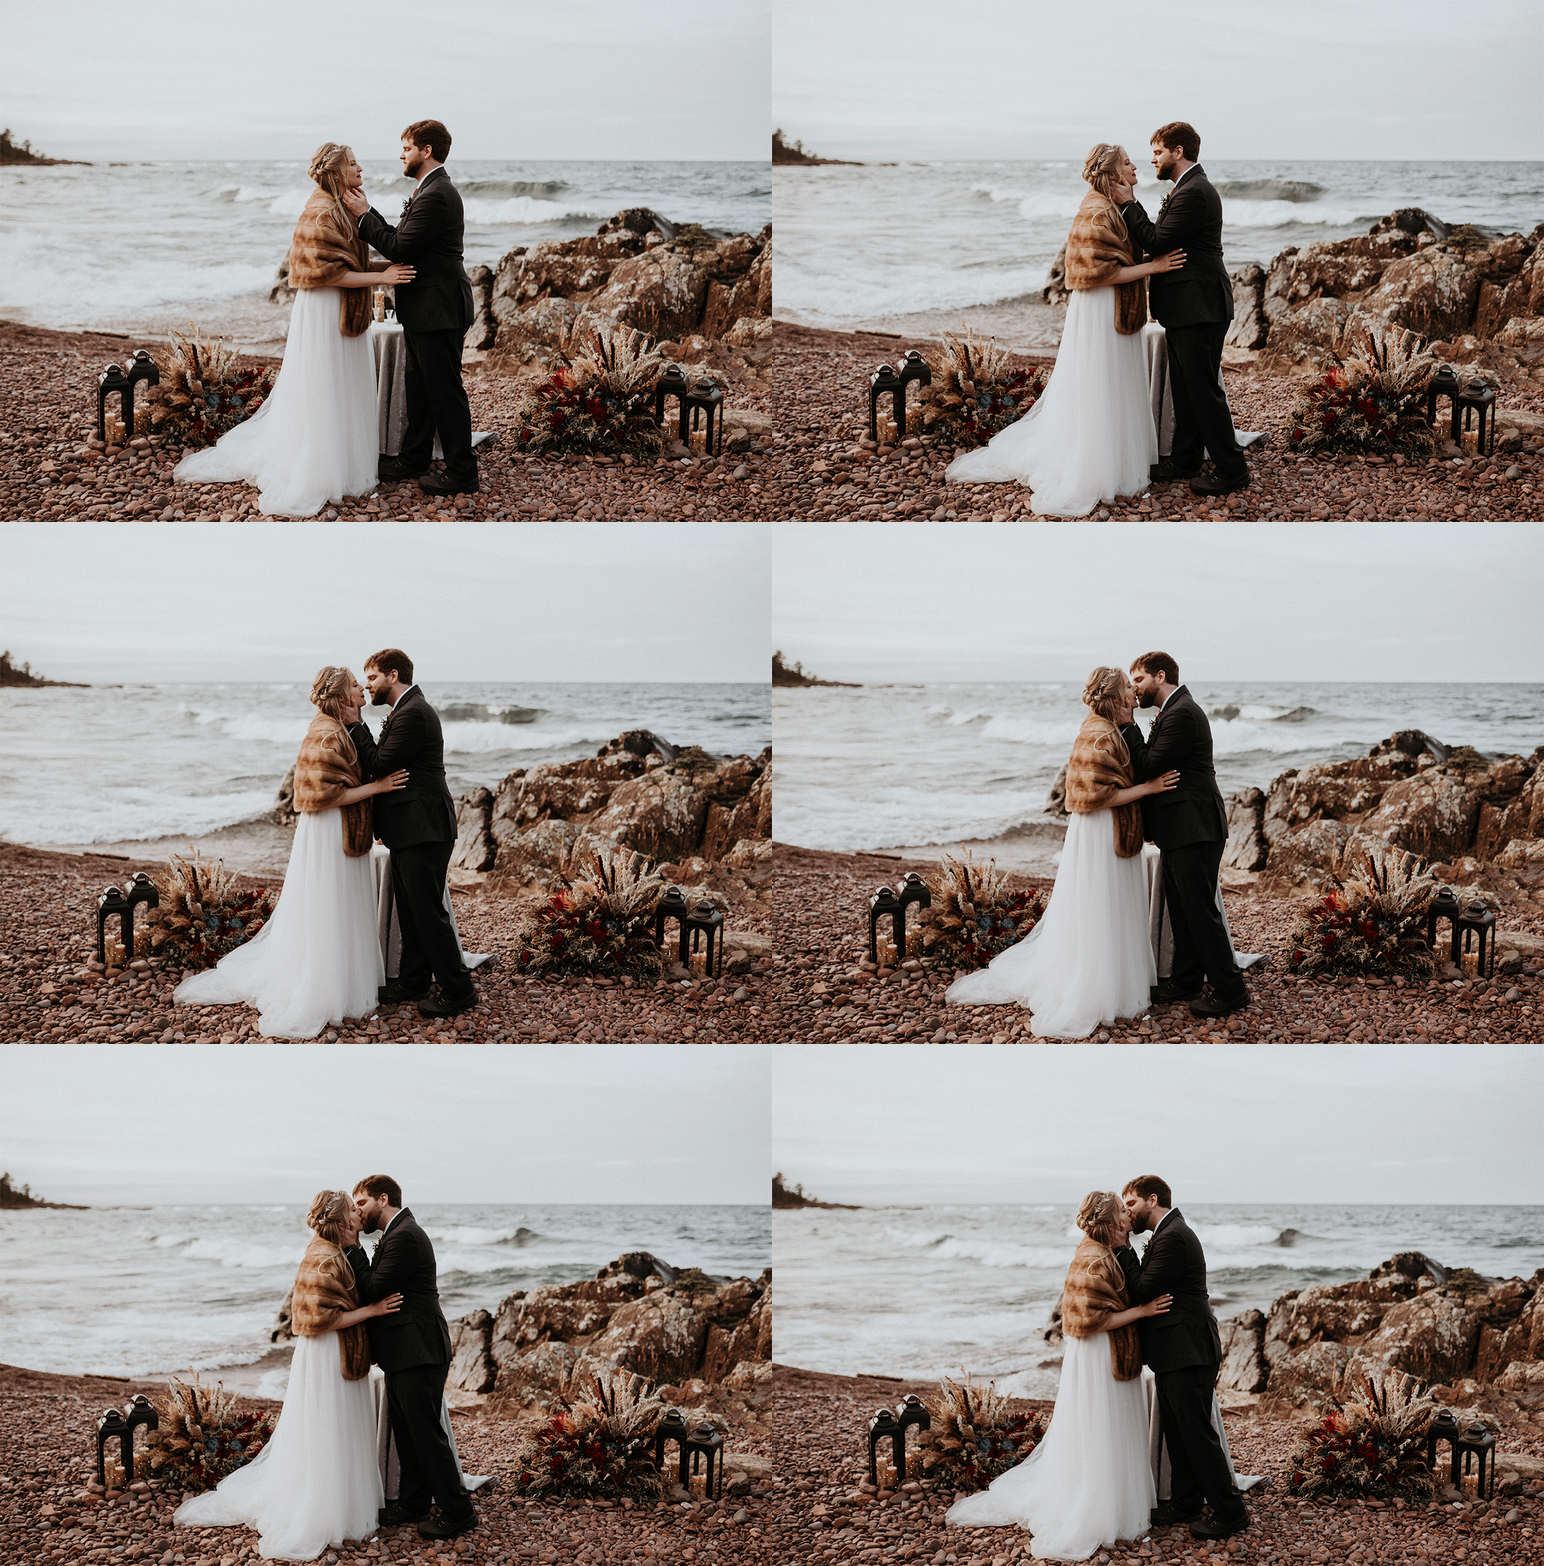
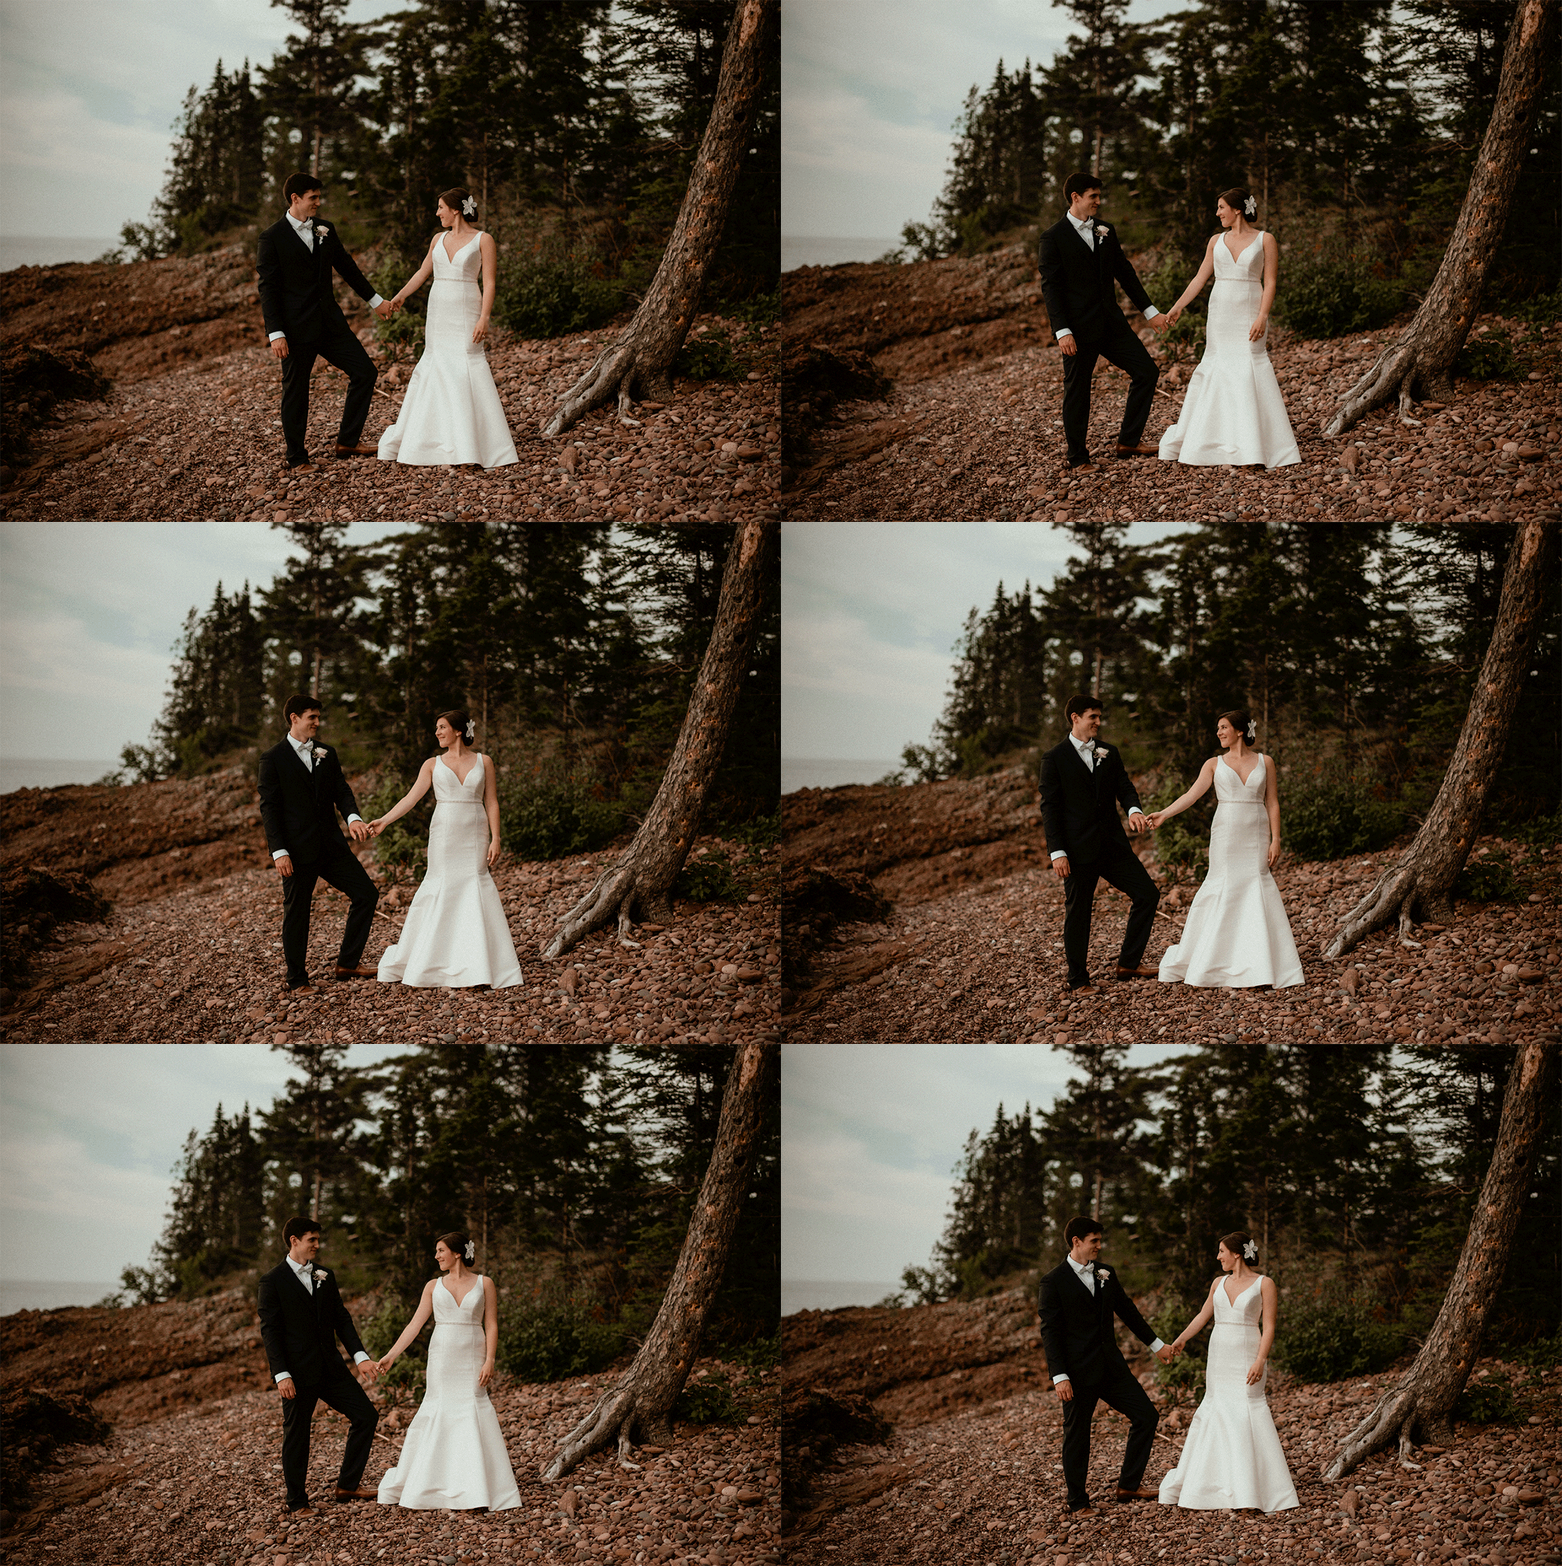
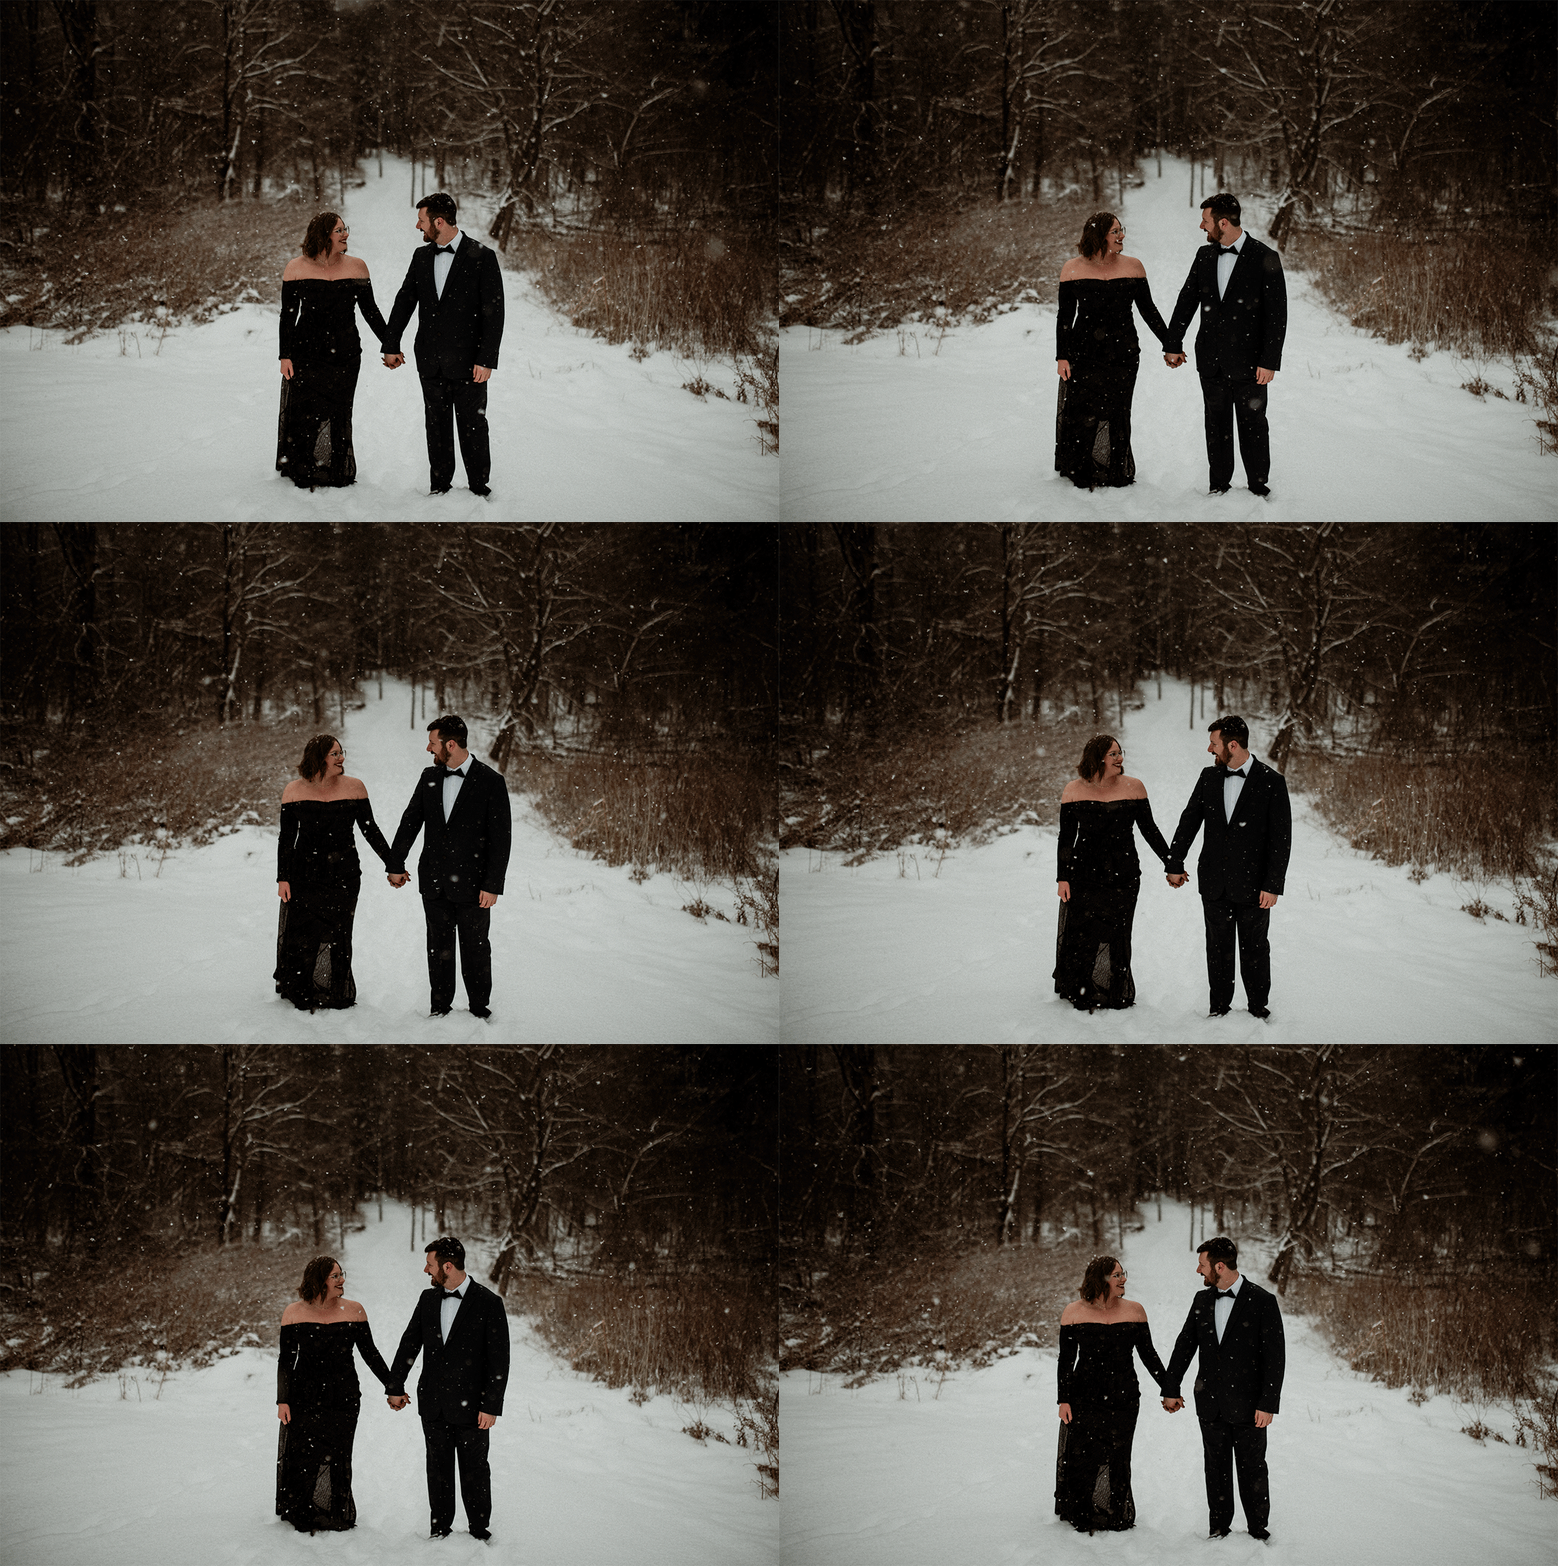
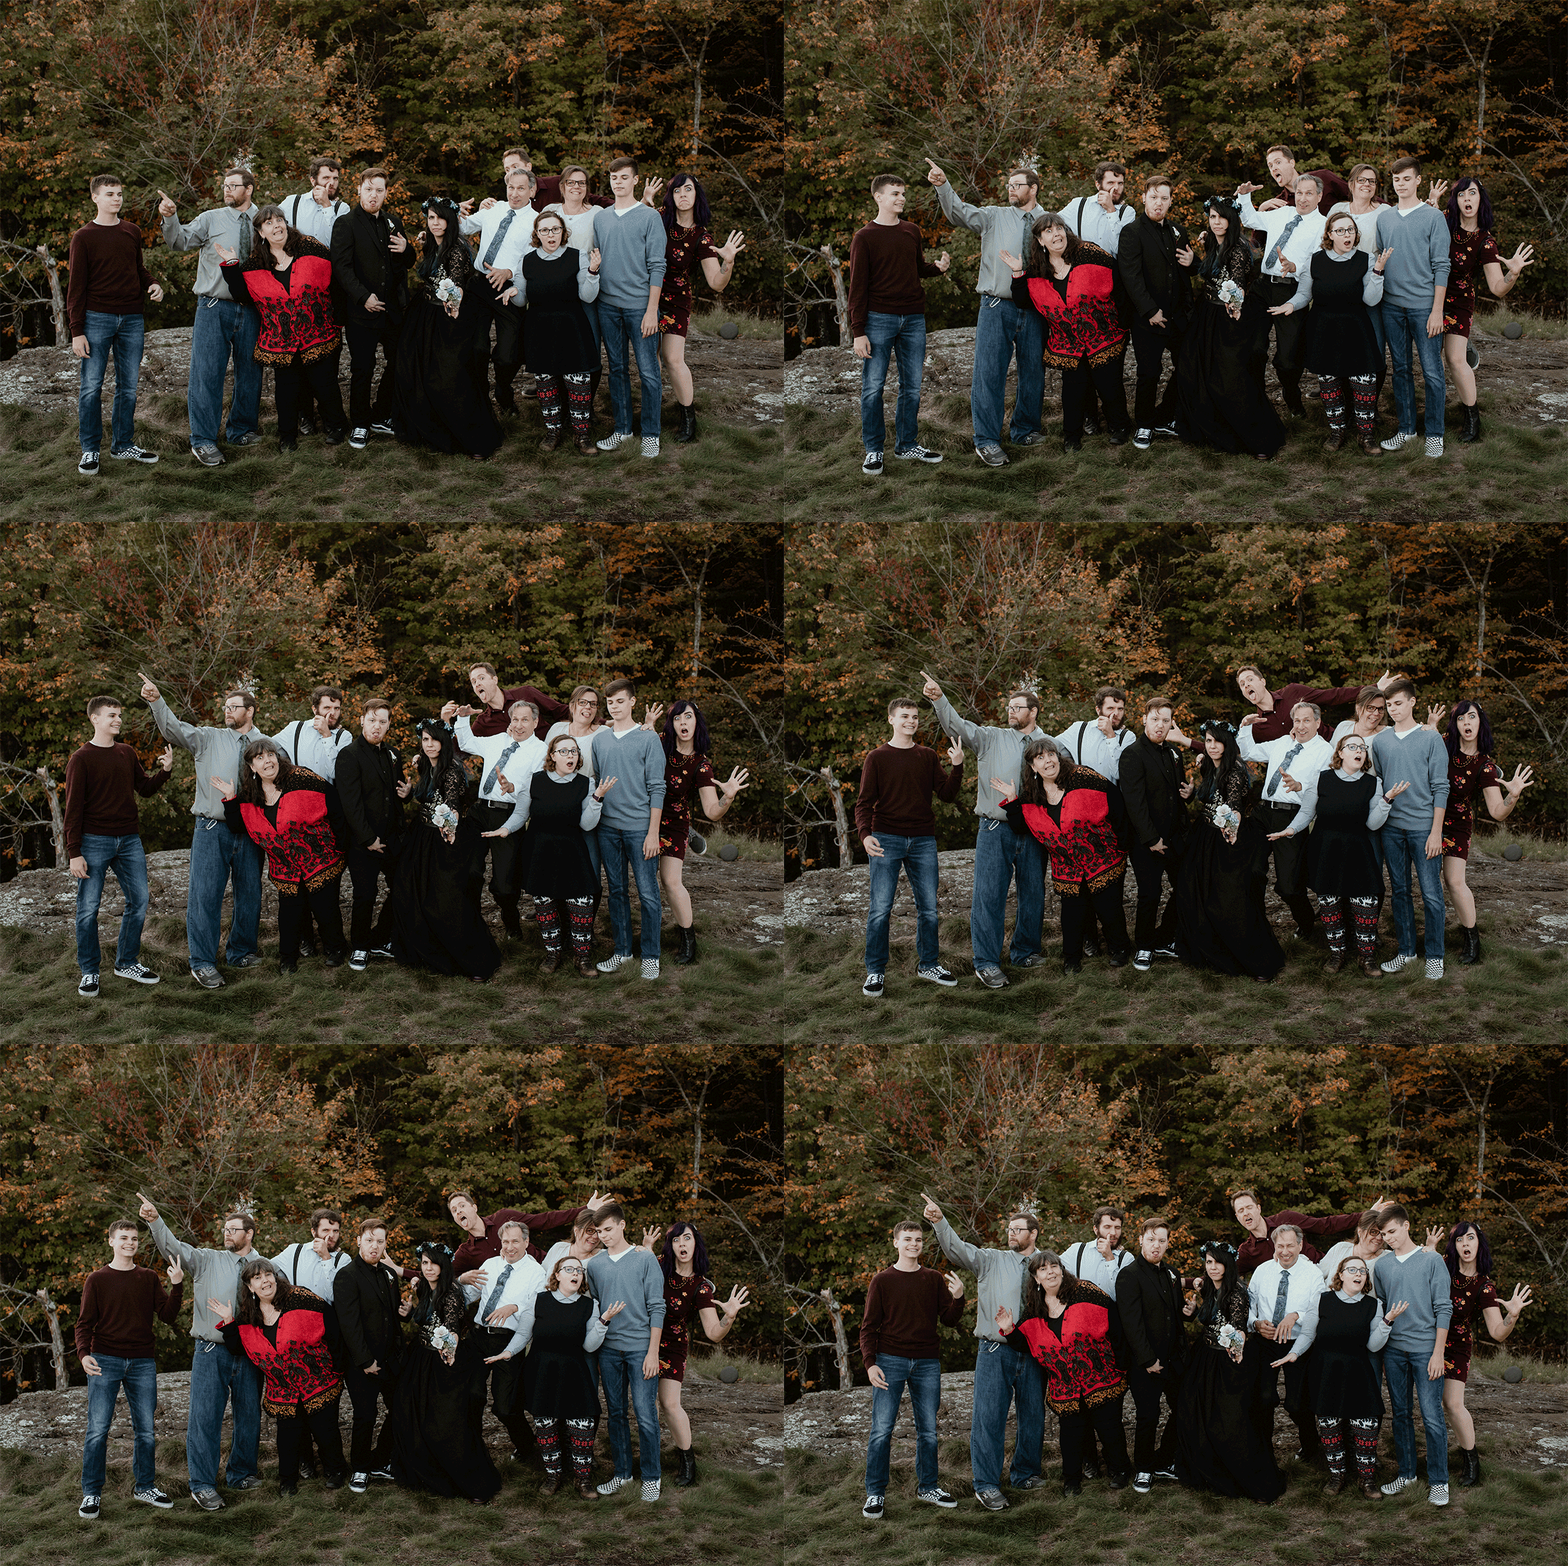
Making a loop manually will get you a result like this:
Auto-align the images
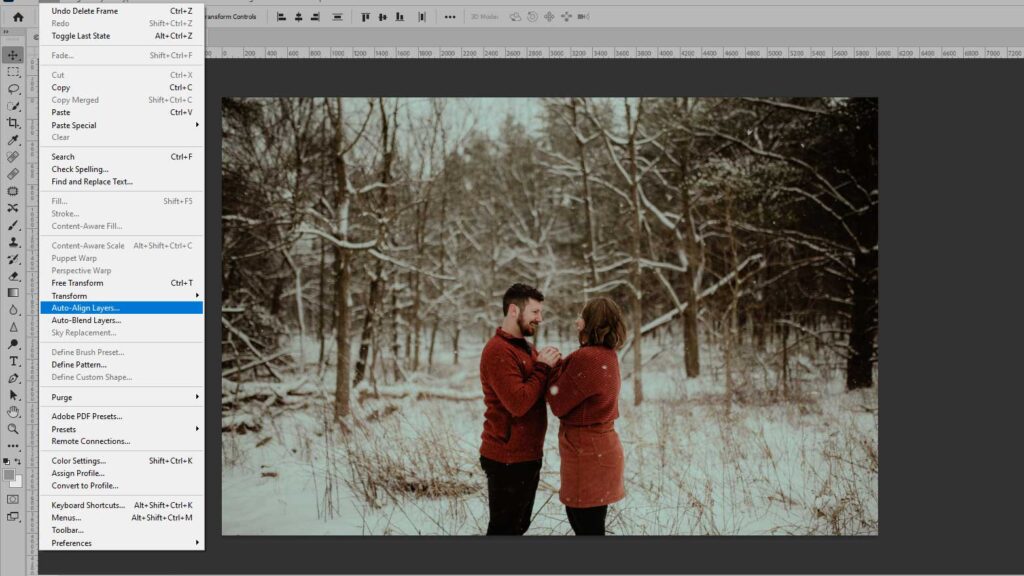
Here’s a trick I like to use on pretty much every GIF I make. Since I don’t use a tripod, my images are usually not perfectly aligned. So while I have all of the images selected in the Layers Panel, I go to the Photoshop top menu, Edit > Auto Align Layers > Auto. Then Photoshop will do it’s best to align each layer and your GIF will turn out MUCH smoother!
Crop and straighten
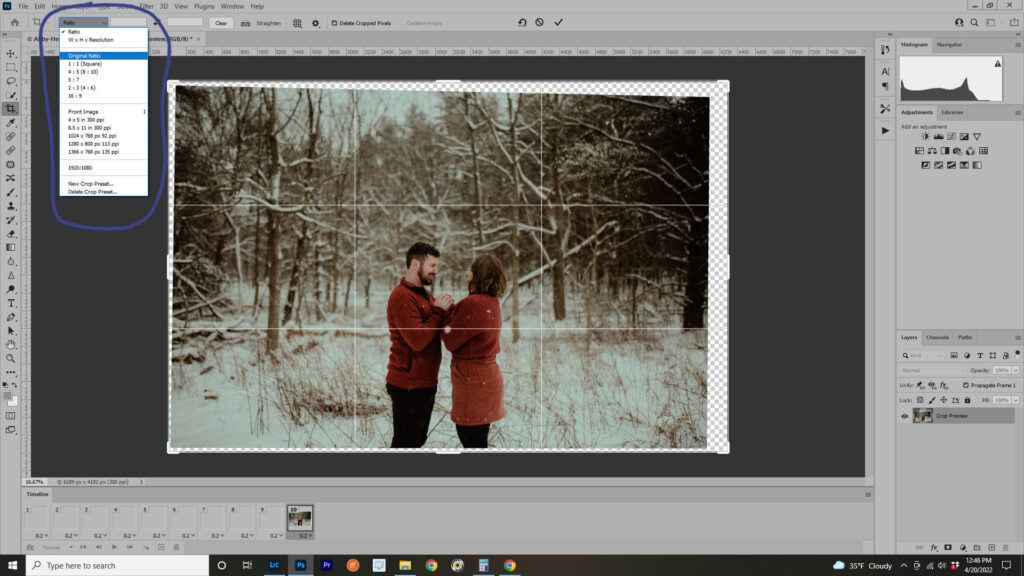
Once you have your images aligned and your GIF sequence created, you can now crop the GIF. Use the Photoshop cropping tool to straighten the images, crop out what you don’t want, and get rid of any blank space that was created when you used Auto Align Layers.
If you make sure “Original Ratio” is selected in the cropping tool menu, your final crop will maintain the original aspect ratio of the images. I like this because then they match the shape of all the other photos in the client’s gallery and don’t stick out.
Optimize the GIF for the web
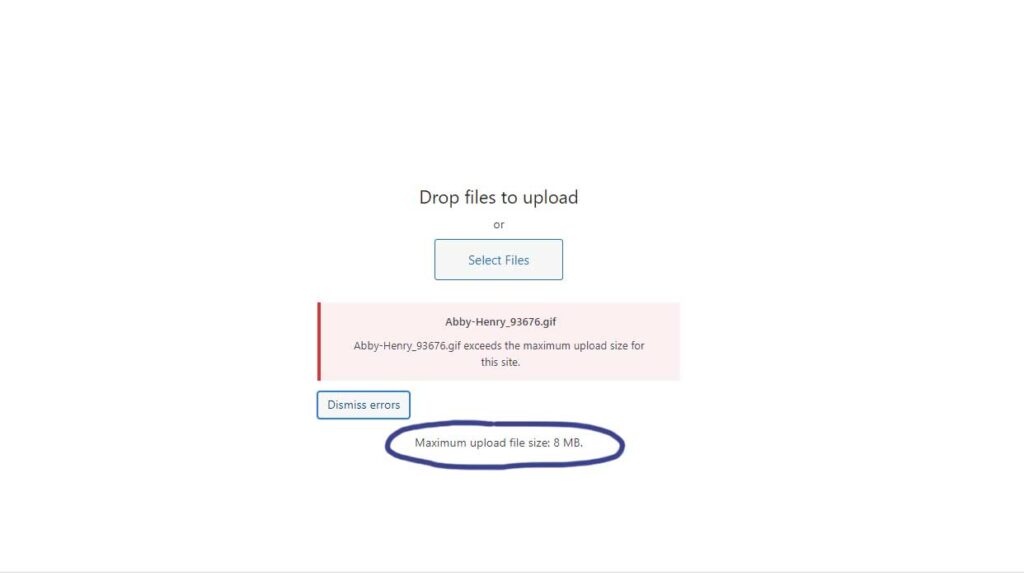
Next, you’ll want to resize your GIF. Basically, you want your GIF size to be as small as possible so it doesn’t take up too much space. GIFs are large files and are difficult to work with if they’re not optimized.
When I resize my GIFs, I know they might be used on my website. My website is a WordPress site, and in order for a GIF to play online, it has to be set as full-size display within WordPress. I know my blog is 1200px wide, so I size my GIFs at 1200px wide. That way they line up correctly with the other images in my blog. If I were to make the GIFs smaller, for example, 900px wide, then they would appear smaller than the still images on my blog post. You can make the GIFs bigger, but I try to optimize the file size to the smallest it can be without losing quality.
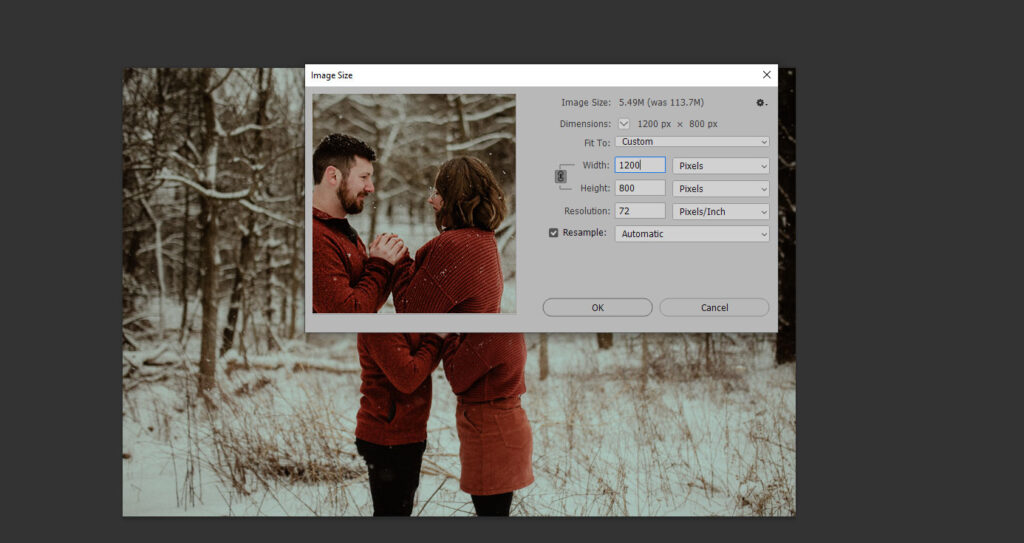
In Photoshop’s top menu, click Image > Image Size. The image resizing window will pop up. Before you do anything, change the resolution to 72 (pixels/inch). This is standard web resolution. Now you can change the size of the image. There is a little chain link between the width and height, and it should be selected, so that when you change one or the other, the other adjusts automatically to maintain the image aspect ratio.
Here’s where I change the width to 1200px. You can put whatever you want here. If you know the width of your blog and think you’ll be sharing the GIF there, use that number. If you have no idea, you can try 1200px and see if it works for you. Or if you don’t plan on blogging your GIFs, you can try 900px wide and see how that works for you.
Saving your GIFs
Once I have my GIF made in Photoshop, I save it to my computer. Each wedding, elopement, or session has a specific labeled folder on my hard drive, and within that folder, I create another one labeled “GIFs”. You can do this ahead of time, or just create the folder during the export process.
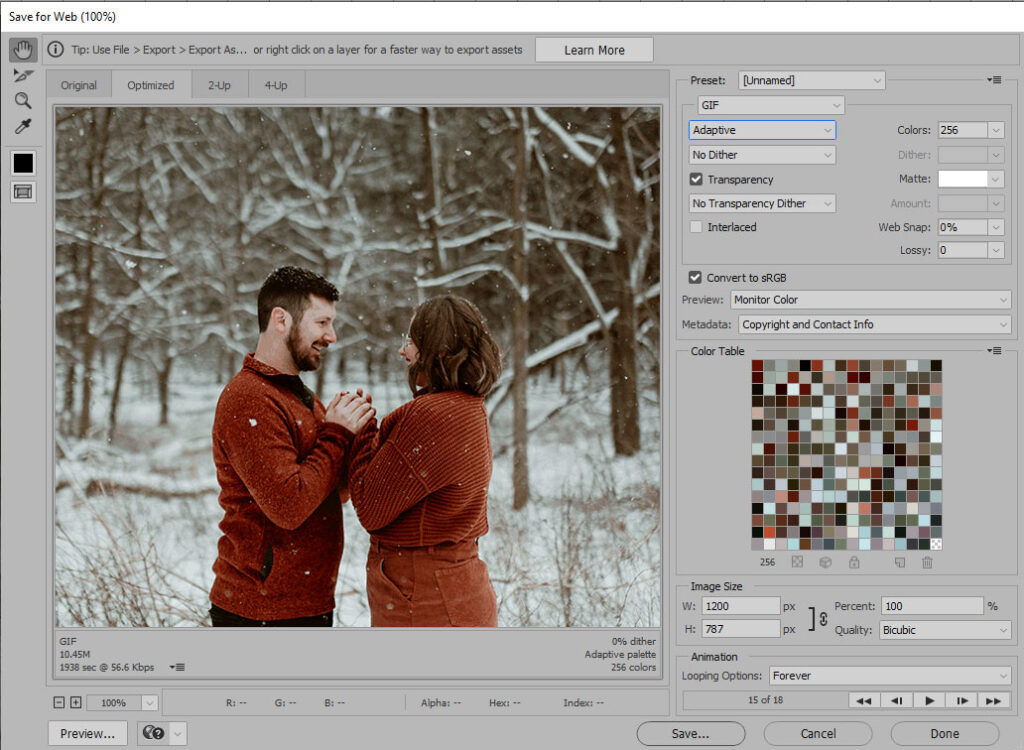
Back in Photoshop, go to File> Export > Save For Web (Legacy). Or on a PC you can hold Shift, Ctrl, Alt & “S” to open the export for web window.
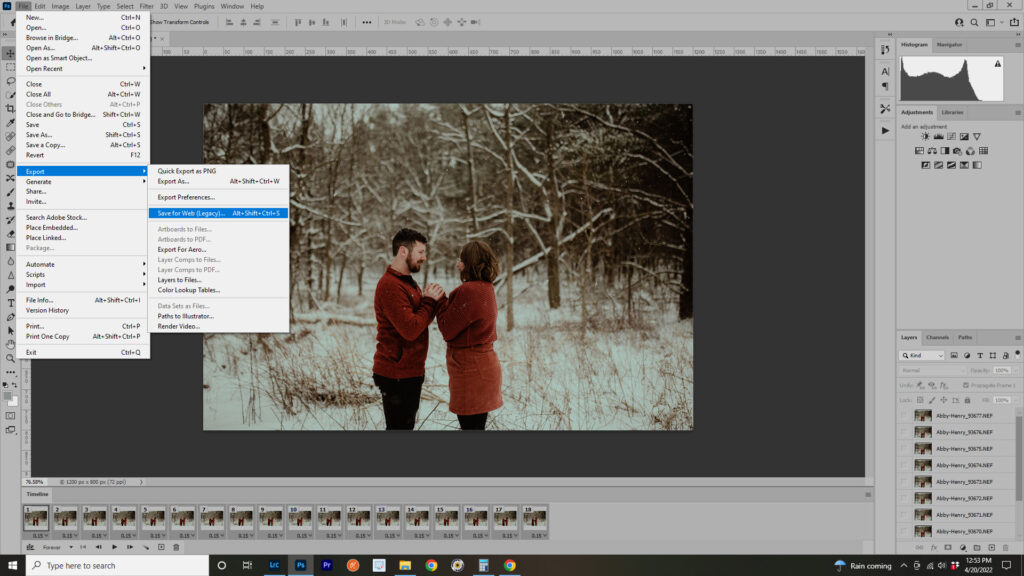
In the Save for Web window, you’ll see a preview of your GIF and a panel to the right. In the right panel, you can choose your export settings. I’ll share what my go-to settings are because over the years I’ve tried different options but these always work the best for me. From top to bottom:
- Preset > GIF 128 No Dither
- Adaptive
- No Dither
- Colors> 256
- Transparency unchecked
- Convert to SRGB checked
- Monitor Color
- Image size (I make sure it’s still 1200px wide)
- Looping Options > Forever
Then click “Save” and navigate to where you want to keep the GIF on your computer.
You just made a GIF!
Congratulations!!! You made a GIF! It might seem like a long, complicated process, but I promise once you get used to making them, it’ll become second nature and will fit right into your workflow.
Video walkthrough
Here’s a video of my computer screen as I go through the steps of creating a GIF in Photoshop for this engagement session. You can see me use the Auto Align tool in Photoshop and create a loop manually, as well as everything else described above!
I created this screen share video with Loom– a free software for creating and sharing web videos! I don’t have a mic currently so there’s no sound, but the video should still be helpful!
Troubleshooting
GIFs are a little surprise that can really make someone’s day. They add an extra bit of magic and excitement, and they’re a great way to show off your skills as a photographer. If you want to learn more about how I work or get some tips from me, feel free to ask! I’m always happy to help out other photographers and offer 1:1 learning and mentoring options!
I’m Andrea.
I’ve been walking this path as a wedding & elopement photographer for over a decade. Learning. Unlearning. Making mistakes. Finding my rhythm. Building a business that feels true to who I am. I offer mentoring for photographers who are craving more alignment, more soul in their work, and more clarity in how they show up.
This work isn’t just about the technical. It’s about energy, presence, and holding space—for others and for yourself.



Hi Andrea, thank you for your useful guide. Could I have a question about the quality of individual pictures and the final GIF? Because your GIFs look sooo great and in such a high quality. Mine looks like a Minecraft product :D So is it about the size of images or the colors? Thank you very much for your answer!
Hi Jane! Does the quality look good when you go to export it, but once it’s exported it looks bad – or does it look bad before you export it? I would play around with the export settings – particularly the color settings – and see if that helps!
WOW! Such a helpful resource on how to make a gif, I’ll definitely be saving it as a reference!
Totally bookmarking this knowledge! Thank you for sharing!!
You’re so very welcome! I’m glad you found it helpful!
This is a fantastic resource I know a lot of photographers will be happy to see!
As a photographer, thank you so much for this tutorial! I’ve never thought about being so intentional with them and its super helpful. definitely bookmarking for later!
This is such a helpful guide and I love that you relate this to Hogwarts/Harry Potter because GIFs (when done right) can be magical. Thank you for including step-by-step instructions and GIF ideas – I’m saving this guide for sure for my future reference :)
Thank you so much for this blog post. I’ve just started getting into making gifs. I need to be more intentional about making them. I always shoot on high speed shooting in hopes that I’ll get enough good pictures to make a gif lol.
Thanks for the feedback! It definitely helps if you have a plan ahead of time. :)
What a cool guide! Totally mesmerized by all of your beautiful gifs! Love the detailed instructions, super helpful, thank you.
I love GIFs and create them too. Your step-by-step guide is so helpful, and I appreciate you sharing the creative aspects of the gif-creating process.